If you live in Canyon Crest, you’ll want your window casings, door frames, soffits, and railings to withstand sun, salt, and moisture, so you’ll need the right prep, primers, and durable finishes. I’ll walk you through which trim to focus on, the best paint choices and prep steps that stop peeling, quick application tips for a clean look, and a simple maintenance plan—but first, let’s pinpoint what needs attention on your home.
Main Points
- Inspect all exterior trim (window casings, door frames, soffits, fascia, gutters, porch railings) for peeling, rot, and mildew before quoting.
- Use acrylic latex with UV stabilizers for most Canyon Crest exposures; choose marine-grade enamel near salt or heavy moisture.
- Prep thoroughly: scrape, sand feathered edges, wash, replace rotten wood, and prime bare or patched areas.
- Apply thin, even coats with angled brush for edges and rollers for flats; remove tape while paint is slightly wet.
- Schedule biannual inspections and call a pro for widespread peeling, rot, persistent moisture, or full-house trim replacement.
What Exterior Trim Needs Painting in Canyon Crest Homes?
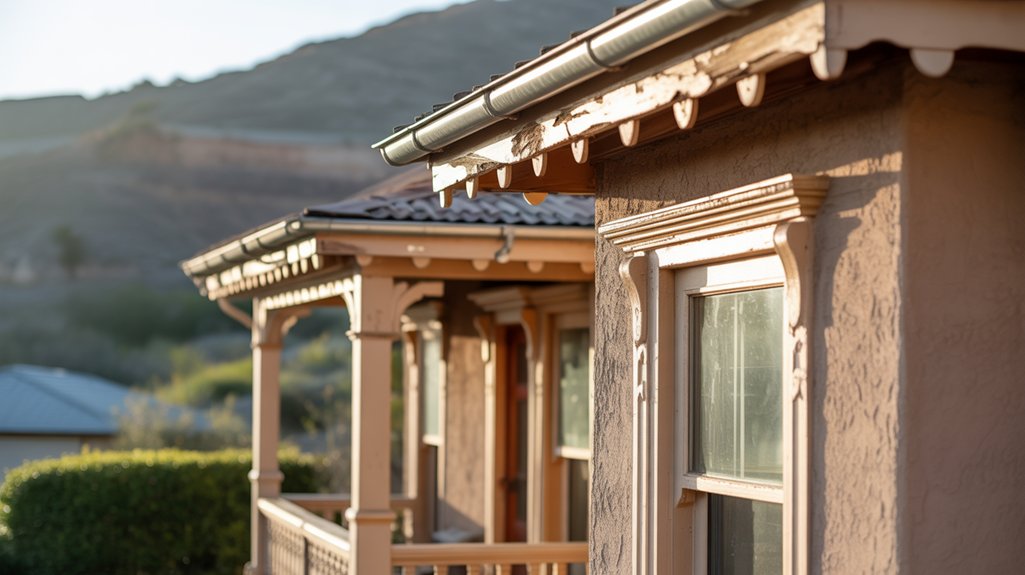
Start by surveying every visible edge and accent on your Canyon Crest home—window casings, door frames, soffits, fascia, gutters, porch railings, and any decorative moldings all count as exterior trim that needs painting.
Begin by surveying every visible edge and accent—window casings, door frames, soffits, fascia, gutters, railings, and moldings.
You’ll also check eaves, corner boards, window sills, door surrounds, vents, and exposed rafter tails.
Don’t forget stair spindles, balusters, and porch columns.
Identify wood, metal, and fiber cement trims separately since prep varies.
Note cracked caulk, peeling paint, mildew, or bare spots.
Mark areas for sanding, priming, or replacement.
That list helps you plan scope, materials, and labor before starting work.
Choose Paints and Finishes That Resist Sun, Salt, and Moisture
Now that you’ve identified the trim types and problem spots, pick paints and finishes that can stand up to Canyon Crest’s intense sun, coastal salt, and seasonal moisture. You’ll want durable chemistry and the right sheens: acrylic latex for UV resistance, elastomeric coatings for flexible sealing on porous trim, marine-grade or high-solids enamels near salt spray, and mildew-resistant formulations for damp seasons.
Match finish to exposure—satin or semi-gloss for easier cleaning, flat only where abrasion’s minimal. Also verify UV inhibitors and corrosion-resistant primers for metal. Choose systems with proven warranties suited to coastal environments.
- Acrylic latex with UV stabilizers
- Elastomeric coatings
- Marine-grade enamel
- Mildew-resistant finish
Prep Steps That Prevent Peeling and Extend Paint Life
Because proper prep locks paint to the substrate, you’ll prevent peeling and get years of service from your trim by removing old loose coatings, cleaning away salt and mildew, and creating a sound, dry surface before you paint.
Start by scraping and sanding to feather edges, then use a chemical stripper on stubborn layers. Wash surfaces with a mild detergent or trisodium phosphate substitute, rinse thoroughly, and let dry completely.
Replace or repair rotten wood and fill gaps with a quality exterior filler. Prime bare wood, metal, and patched areas with an appropriate primer to guarantee adhesion and uniform topcoat performance.
Quick Application Tips for Professional-Looking Trim Results
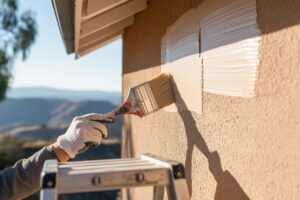
When you’re ready to apply paint, work methodically—cut crisp edges with a high-quality angled brush, maintain a loaded-but-not-dripping brush, and use a good sash or mini-roller to lay down smooth, even coats across flat trim.
Stay patient between thin coats, sand light finger-raises with fine grit, and tack off dust before recoating. Keep brush strokes consistent in direction and feather edges to avoid lap marks. Protect hardware and adjacent surfaces with low-tack tape and remove it while paint is slightly wet for clean lines.
- Hold steady, rest your wrist
- Load brush correctly
- Roll with light pressure
- Check in bright light
Maintenance Schedule and When to Call a Pro
After you’ve achieved crisp edges and smooth, even coats, plan a simple maintenance schedule to keep exterior trim looking its best and to catch wear before it becomes costly.
Inspect trim twice yearly—spring and fall—for peeling, cracking, mildew, and caulking gaps. Touch up small chips within weeks to prevent moisture damage; sand, prime, and repaint affected spots.
Clean trim annually with a gentle detergent and soft brush.
If you see rot, widespread peeling, persistent moisture issues, or if the job feels overwhelming, call a pro. They’ll assess structural concerns, match finishes, and safeguard durable results so you avoid costly repairs.
Frequently Asked Questions
Can Exterior Trim Color Choices Affect Home Resale Value?
Yes — your trim color choices can influence resale value. You’ll want neutral, high-contrast combos that highlight architectural features, appeal to broad buyers, and suggest good maintenance. Bold, trendy shades might limit buyer interest.
Can I Paint Trim Myself Without Specialized Tools?
Yes—you can paint trim yourself without specialized tools if you use basic items like brushes, rollers, sandpaper, caulk, primer, and drop cloths. Take time for prep, thin coats, and patience to achieve professional-looking results.
Are Eco-Friendly Paint Options Effective for Coastal Climates?
Yes — eco-friendly paints can perform well in coastal climates. You’ll choose formulations with mildew resistance, UV protection, and flexible binders; look for marine-grade or high-performance acrylics and proper surface prep to guarantee lasting results.
How Long After Painting Before I Can Caulk or Seal Joints?
You should wait 24–48 hours for paint to dry to the touch, but full cure can take 7–14 days; if the paint’s tack-free and manufacturer allows, you can caulk after 24–48 hours, otherwise wait the full cure time.
Do Homeowners Associations Restrict Trim Paint Colors?
Yes, they often do. You’ll need to check your HOA rules or get approval before painting trim, since associations usually have color palettes, preset codes, and review processes to safeguard consistency and neighborhood standards are met.
Call for Quote Today
You’ve covered the key trim areas—casings, frames, soffits, fascia, gutters, railings—and chosen durable coatings made for sun, salt, and moisture. By prepping thoroughly—scraping, sanding, priming, repairing—you’ll cut down peeling and touch-ups. Use satin or semi‑gloss UV‑resistant acrylics or marine enamels and apply thin, even coats for a pro finish. Follow a seasonal maintenance schedule, handle small repairs promptly, and call a pro when rot or widespread failure shows up.